Introduction to iera.ai
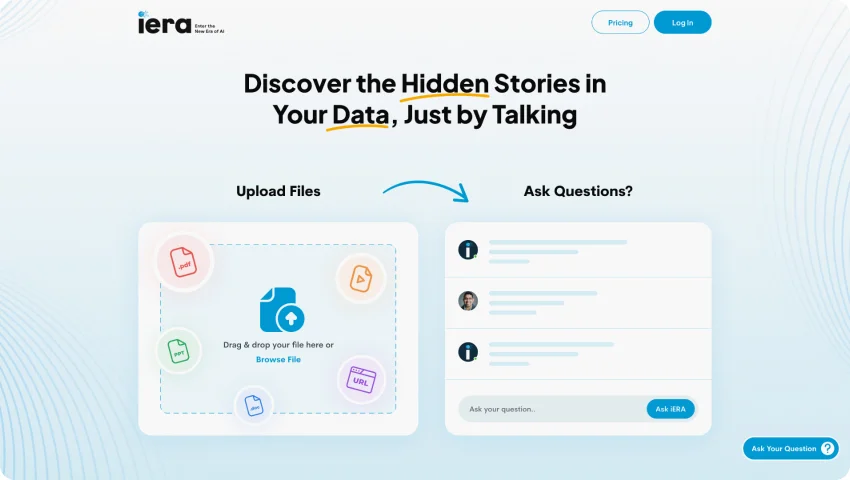
Discover the Hidden Stories in Your Data, Just by Talking
iera allows you to elevate customer and employee experiences with cutting-edge AI technology. This powerful tool enable users to harness the potential of their data through dynamic, interactive dialogues.
Who is iera.ai for?
-
Businesses of All Sizes
Small, medium, and large businesses across industries can leverage iera.ai to enhance customer engagement, streamline internal communication, and provide multilingual support.
-
Customer Support Teams
Customer support teams looking to automate responses, provide instant solutions, and improve overall customer satisfaction can integrate iera.ai into their operations.
-
Internal Communication Departments
Departments focused on improving internal communication and employee support can use iera.ai to create efficient and personalized conversational experiences within the organization.
-
Global Enterprises
Businesses with a global presence that require multilingual support and effective communication with a diverse audience can use iera.ai to break language barriers.
-
Researchers
Researchers seeking to transform static data into engaging conversations can use iera.ai to uncover hidden insights and communicate findings dynamically.
-
Individuals with Knowledge Bases
Individuals or entities with knowledge bases and information repositories can employ iera.ai to automate FAQ generation, ensuring quick and accurate responses for users.
-
Those Seeking Dynamic Conversations
Anyone looking to turn data into engaging dialogues, customize conversational flows, and create a dynamic user experience can use iera.ai for a wide range of applications.
iera.ai is versatile and caters to a diverse audience, including businesses, customer support teams, developers, researchers, and individuals seeking dynamic conversational solutions and enhanced engagement.
Getting Started with iera.ai
Welcome to iera.ai, your advanced conversational AI companion designed to help you unlock the hidden stories within your data effortlessly. This support document will guide you through the steps to effectively use iera.ai, from uploading various file types to asking insightful questions about your data.
-
Registration and Login Process
iera.ai offers a user-friendly registration and login process, allowing you to quickly access the powerful features of our conversational AI platform. Follow the steps below to register and start harnessing the capabilities of iera.ai:
-
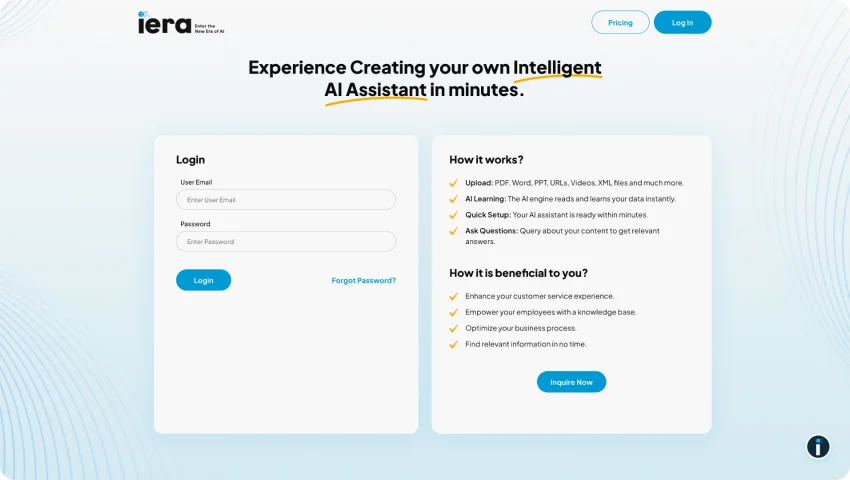
Accessing the iera.ai Website
- Open your web browser and navigate to iera.ai
- On the homepage, locate the "Login" button. Click on it to initiate the registration and login process.
-
Registration
- On the login page, you'll find the "Register" tab. Click on it to proceed with the registration.
- Enter your email address in the provided field.
- A One-Time Password (OTP) will be sent to the email address you provided. Check your inbox and enter the OTP on the registration page to verify your email.

-
Setting Up Your Account
- Once the email is verified, set a strong password for your iera.ai account.
- Select your business type from the available options. This information helps iera.ai tailor its services to your specific needs.
- Click on the "Register" button to complete the registration process.
-
Logging In:
- Return to the login page and enter your registered email and password.
- Click on the "Login" button to access your iera.ai account.
Congratulations! You have successfully registered with iera.ai and logged in to your account. Now, you can explore the various sections and features of iera.ai. If you encounter any issues during the registration or login process, refer to our troubleshooting guide or contact our support team for assistance.
Exploring the iera.ai Dashboard
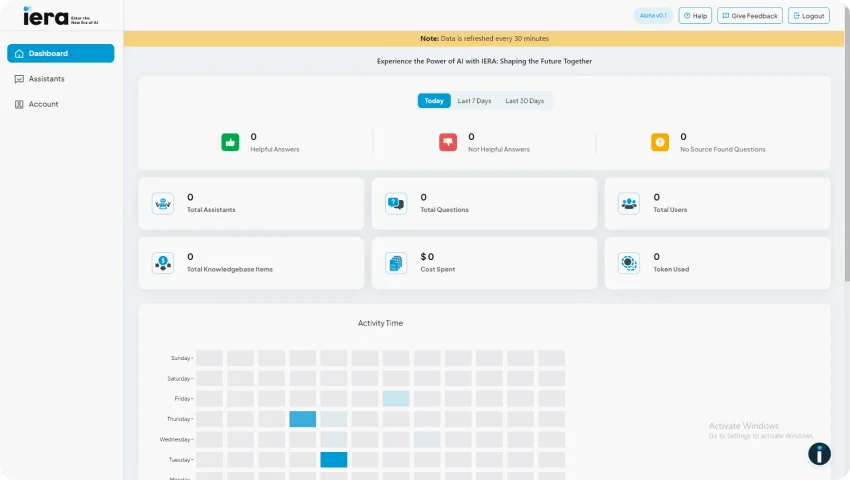
Welcome to the iera.ai Dashboard, your central hub for monitoring and managing the performance of your AI assistants. The dashboard provides valuable insights into user interactions, analytics, and overall system health. Let's delve into the key components you'll find on the iera.ai Dashboard:
1. User Feedback
-
Helpful Answers
This section displays the number of answers provided by your AI assistant that users have found helpful. It serves as a quick gauge of the effectiveness of your AI in addressing user queries.
-
Not Helpful Answers
Keep track of answers that users have marked as not helpful. This feedback is crucial for refining your AI's responses and enhancing user satisfaction.
-
No Source Found Questions
Monitor the instances where users did not receive a satisfactory response due to a lack of available sources. This information helps identify gaps in your knowledge base.
2. Analytics
-
Total Assistants Created
Track the number of AI assistants you have created. This metric is essential for managing and organizing multiple AI assistants based on different topics or areas of interest.
-
Total Questions
Gain insights into the overall user engagement by monitoring the total number of questions asked. This helps assess the popularity and utilization of your AI assistants.
-
Total Users
Keep tabs on the user base interacting with your AI. Understanding the number of users provides context for the scale of your AI deployment.
-
Total Knowledge Base Items
Monitor the growth of your knowledge base by tracking the total number of items available. This metric reflects the depth and breadth of information accessible to your AI.
-
Cost Spent
Keep an eye on the cost associated with your iera.ai usage. This is particularly useful for managing your budget and optimizing resource allocation.
-
Token Used
Track the consumption of tokens, representing the computational resources used by iera.ai. Monitoring token usage helps ensure efficient resource management.
The iera.ai Dashboard provides a comprehensive overview of your AI ecosystem, empowering you to make informed decisions and enhance the effectiveness of your conversational AI assistants.
Creating and Training Your Intelligent Assistant
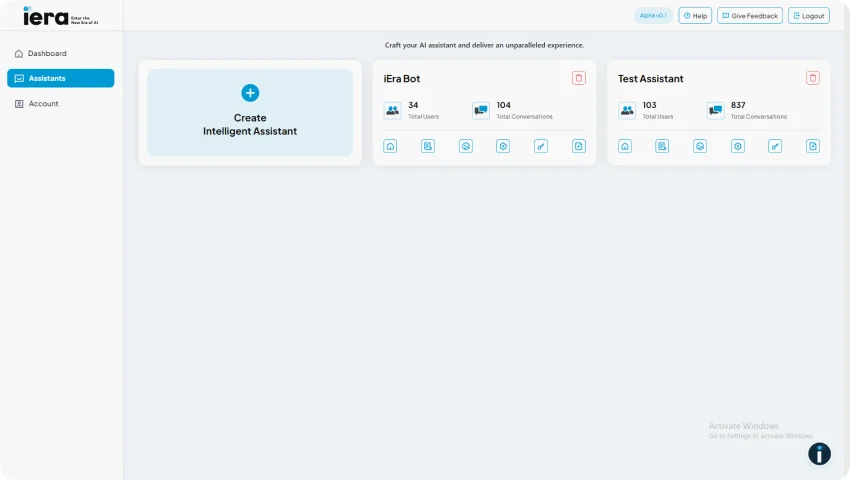
iera.ai empowers you to create intelligent assistants tailored to your specific needs. Follow these steps to seamlessly create and train your AI assistant for effective Q&A interactions:
-
Creating Your Assistant
- Navigate to the "Assistants" page.
- Click on the "Create Intelligent Assistant" option.
- Provide a unique name for your assistant and select the assistant type that best fits your requirements.
- Click on "Create Assistant" to generate your new assistant.

-
Training Your Assistant
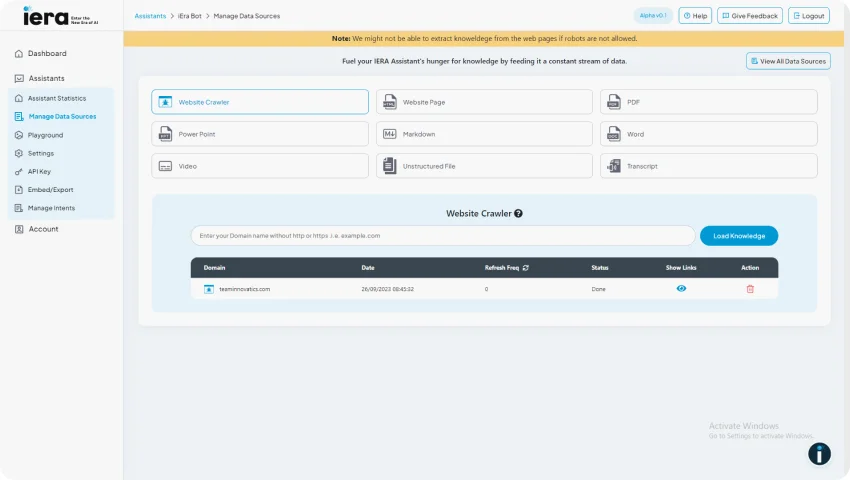
- To train your assistant, click on the "Manage Data Sources" icon within the assistant page.
- In the "Manage Data Sources" section, you'll find various options to feed knowledge to your assistant. Choose from the following formats:
- Website Crawler: Extract information from website links dynamically.
- Website Page: Upload content from specific web pages.
- PDF, PPTX, Word: Upload documents in popular formats.
- Markdown: Utilize markdown-formatted text for structured content.
- Video: Extract insights from video content.
- Unstructured Files: Process data from files with no predefined format.
- Transcript: Train your assistant using transcriptions of spoken content.
- Select the suitable format for your data and upload the relevant content.
- Click on the "Load Knowledge" button to initiate the training process.
- You can also view all your data sources on the “Manage data sources” page
- In just a few seconds, your assistant will be trained and ready for Q&A interactions.
Playground: Interactive Exploration
Welcome to the Playground, the dynamic space where you can engage with your trained assistant in real-time, asking any questions related to the data it has been trained on. This interactive environment allows you to test and refine your assistant's responses, ensuring it provides accurate and relevant information to users. Let's explore the key features and functionalities within the Playground:
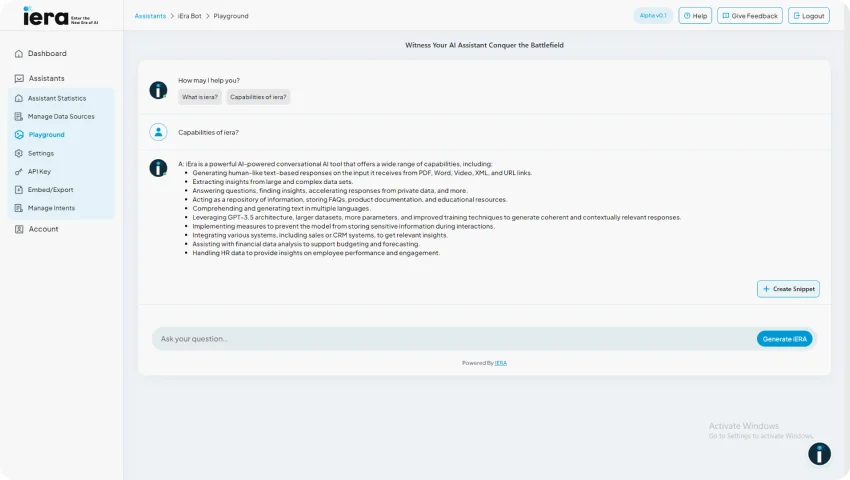
1. Ask Anything
In the Playground, you have the freedom to ask any questions related to the data your assistant has been trained on. This is an opportunity to test the capabilities of your AI and see how well it understands and responds to a variety of queries.
Pose questions in a conversational manner, exploring different aspects of your data to evaluate the comprehensiveness of your assistant's knowledge.
2. Getting Started - Playground
- Navigate to the Playground option within your assistant's interface.
- Start asking questions related to your trained data. The assistant will provide responses based on its learning.
- Evaluate the answers and identify opportunities for refinement.
- Use the insights gained from interactive sessions to improve the performance of your assistant.
3. Interactive Learning
The Playground is not just a testing ground; it's a space for continuous improvement and optimization. Regularly engage with your assistant in the Playground to refine its capabilities, ensuring a seamless and effective conversational experience for users.
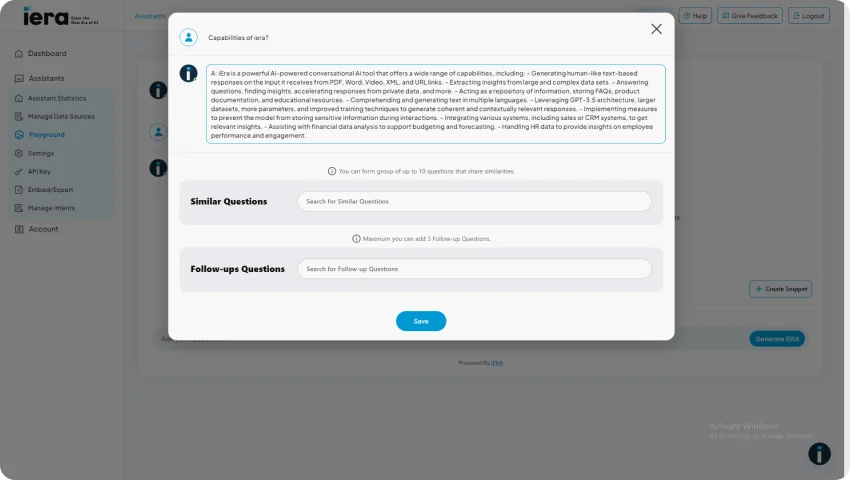
4. Create Snippet Feature
The Create Snippet feature is a powerful feature designed to enhance the accuracy of your assistant's answers and create a more engaging user experience. Here's how you can leverage this feature:
-
Modify AI Assistant Answers
- Click on the Create Snippet icon next to a particular answer provided by the bot.
- Modify the answer to better align with your preferences or specific user needs.
- This feature allows you to tailor responses to ensure accuracy and relevance.
-
Add Similar Questions
- Include similar questions that users might ask to trigger the same or a modified response.
- Enhance the assistant's ability to handle variations of user queries for a more comprehensive interaction.
-
Follow-Up Questions
- Create a conversation flow by adding follow-up questions.
- Define how the assistant should respond to sequential queries, creating a more natural and dynamic conversation.
5. Getting Started- To utilize the Create Snippet feature
- Navigate to the Playground page within your assistant.
- Identify a bot-generated answer that you want to modify or improve.
- Click on the Create Snippet icon to access the editing interface.
- Modify the answer, add similar questions, and include follow-up questions as needed.
- Save the snippet to apply the changes and improve your assistant's responsiveness.
The Create Snippet feature puts you in control, allowing you to continuously refine and optimize your assistant for better accuracy and user satisfaction. Explore this tool to fine-tune your assistant's responses and create a more personalized and effective conversational AI experience.
Tailoring Your AI Assistant: Settings Overview
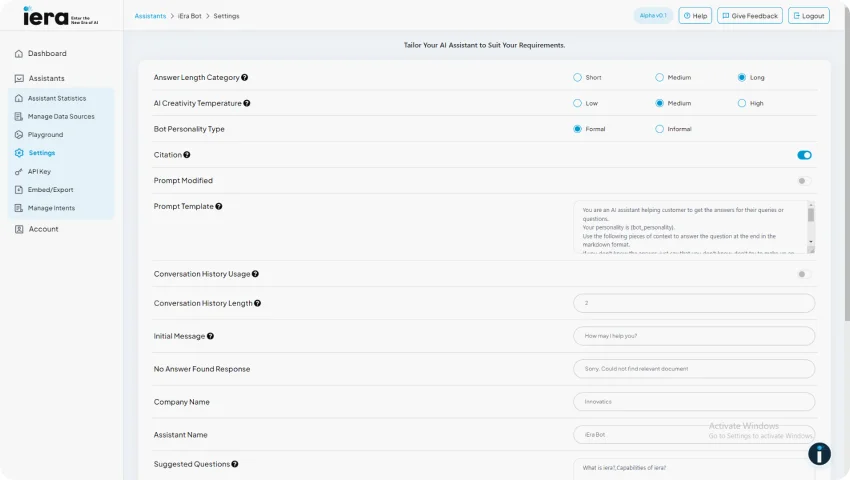
Customize your AI assistant to meet your specific requirements and enhance the user experience through the versatile settings available. The Settings page allows you to fine-tune various aspects of your assistant's behavior and appearance. Let's delve into the key customization options and their use cases:
-
Answer Length Category
Choose from short, medium, or long answer lengths based on your preferences or the nature of the information. Short answers can be ideal for quick responses, while long answers may provide more in-depth explanations.
-
AI Creativity Temperature
Adjust the creativity temperature to control the level of creativity in your AI assistant's responses. A higher temperature may result in more imaginative and creative answers, while a lower temperature ensures more factual and straightforward responses.
-
Bot Personality Type
Define the personality of your AI assistant by choosing between formal and informal tones. This setting allows you to align the assistant's communication style with your brand or user expectations.
-
Citation
Enable or disable citation to indicate whether the assistant should include references or sources in its responses. This is essential for maintaining transparency and providing users with verifiable information.
-
Prompt Modified
Modify the initial prompt to guide your AI assistant's responses. This option allows you to fine-tune the context or direction for more targeted answers.
-
Prompt Template
Create and use templates for prompts to streamline the input process. This can be particularly useful when dealing with repetitive or structured queries.
-
Conversation History Usage
Choose how the assistant uses the conversation history. Opt for contextual responses by enabling this feature, allowing the AI to refer to past interactions for a more coherent conversation flow.
-
Companies with Evolving Content
Businesses regularly updating their content can use iera.ai's periodic refresh feature to keep the chatbot equipped with the latest information for accurate and relevant responses.
-
Conversation History Length
Set the maximum length of the conversation history to manage the retention of past interactions. This can impact the assistant's ability to recall and reference previous user queries.
-
Initial Message
Customize the initial message users receive when engaging with your AI assistant. This is an opportunity to set the tone and provide guidance on how users should interact.
-
No Answer Found Response
Define the response users receive when the assistant encounters a query with no available answer. This ensures a user-friendly experience even when the assistant can't provide a solution.
-
Company Name
Specify your company name to personalize the assistant's identity and reinforce your brand.
-
Assistant Name
Choose a unique name for your assistant to enhance its individual identity and make it more memorable for users.
-
Suggested Questions
Enable or disable suggested questions to guide users in forming queries. This feature assists users in interacting effectively with the assistant.
-
Widget Bot Message Icon
Customize the bot message icon displayed in the widget to align with your brand or enhance visual appeal.
-
Widget Background Color
Personalize the widget background color to match your brand's aesthetics and create a cohesive visual experience.
-
Widget Font Color
Adjust the font color within the widget for optimal readability and visual harmony.
Getting Started: Settings
- Navigate to the Settings page within your AI assistant interface.
- Explore each option and adjust the settings according to your preferences.
- Save changes to apply the customized settings to your AI assistant.
By utilizing these settings, you have the flexibility to tailor your AI assistant, ensuring it aligns seamlessly with your brand identity and meets the specific needs of your users. Regularly review and update these settings to refine the user experience and maintain the effectiveness of your conversational AI.
iera.ai API key integration
Integrate iera.ai's advanced language model capabilities into your applications seamlessly with our user-friendly API. This section guides you through the process of obtaining an API key and making the first steps to harness the power of iera.ai in your own projects.
-
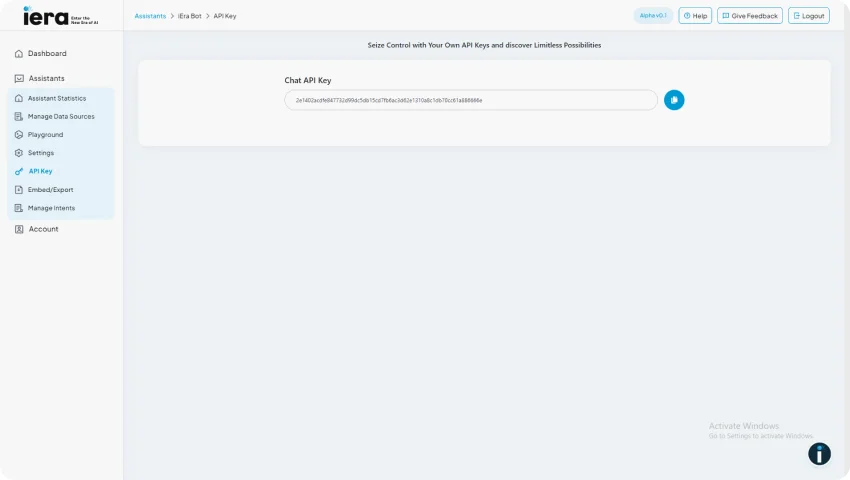
Generating an API Key
- Navigate to iera.ai Assistant Dashboard: Log in to your iera.ai account and go to the assistant dashboard.
- Access the 'API Keys' Tab: In the dashboard, locate and click on the 'API Keys' tab.
- Copy Your API Key: Your API key will be displayed on the screen. Copy this key to your clipboard.
-
Making a POST Request
- Once you have your API key, you can start utilizing the iera.ai API by making a POST request to the following endpoint: __________________________
By utilizing these settings, you have the flexibility to tailor your AI assistant, ensuring it aligns seamlessly with your brand identity and meets the specific needs of your users. Regularly review and update these settings to refine the user experience and maintain the effectiveness of your conversational AI.
Embed and Export: Integrating Conversational AI into Your Web
Iera.ai allows you to leverage the full potential of Conversational AI by seamlessly integrating your created assistant into your website. The Embed and Export feature simplifies the process, allowing you to enhance user engagement and provide instant assistance. Here's how you can unlock the power of your AI assistant on your web platform:
-
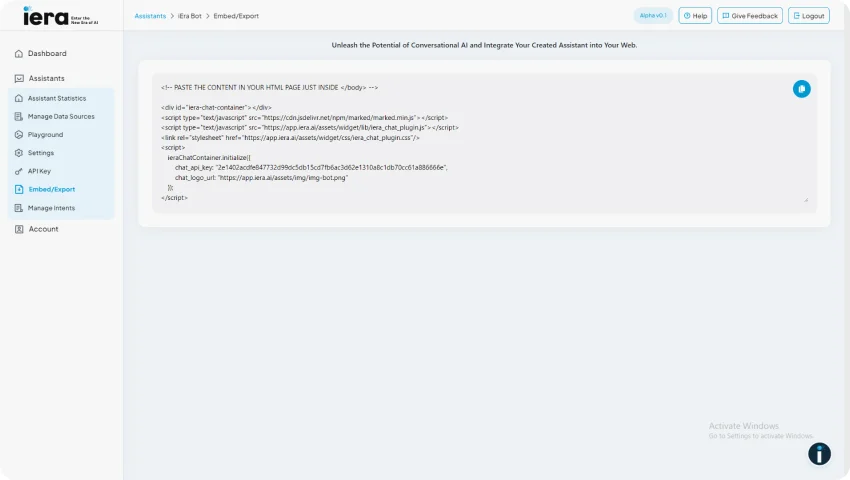
Getting Started - Embed /Export
- Navigate to the Embed and Export section on the left panel of your AI assistant interface.
- Find the generated embed code specifically tailored for your AI assistant and follow the steps given below.
- Copy the provided code snippet to your clipboard.
- Open the HTML page of your website where you want the assistant to appear.
- Paste the copied code into the desired section of your HTML page.
- Save and publish your web page to make the assistant live on your website.
In case, if you feel further assistance in configuring the assistant to your website please connect to our support team at support@iera.com
Iera.ai API use case
-
Virtual Assistants
Embedding iera.ai as your virtual assistant brings advanced language understanding to the forefront. With its sophisticated natural language processing (NLP) capabilities, iera.ai comprehends user queries in a human-like manner, enhancing the conversational aspect of interactions. Additionally, the assistant's information retrieval prowess ensures accurate and relevant responses, making it an indispensable resource for users seeking intelligent assistance.
-
FAQ Automation
iera.ai excels in FAQ automation by automatically generating responses to frequently asked questions. This feature not only saves time but also ensures consistency in providing information. By embedding iera.ai on your website, you streamline the process of addressing common queries, offering users quick and reliable answers to their most pressing questions.
-
Knowledge Base Search
iera.ai enhances the user experience through a robust knowledge base search functionality. Users can easily and efficiently find the information they need by asking questions or entering search queries. The AI's ability to understand and process diverse data formats ensures a comprehensive search experience, making it an invaluable tool for users looking to explore and retrieve specific information from your website or application.
-
Enhanced User Engagement
By exporting iera.ai onto your website, you create a direct and seamless channel for user interaction. Visitors can easily engage with the AI assistant, leading to increased user satisfaction and a more dynamic browsing experience.
-
Efficient Customer Support
The AI assistant serves as a valuable resource for addressing user queries and providing information. This not only streamlines customer support processes but also reduces the load on human support teams, allowing them to focus on more complex issues.
-
Personalized User Interactions
iera.ai, when embedded on your website, can be configured to offer personalized interactions based on user behavior and preferences. This customization enhances the user experience, making interactions more relevant and tailored to individual needs.
-
Data-Driven Insights
Integrating iera.ai into your website provides access to valuable data on user interactions and queries. Analyzing this data allows you to gain insights into user preferences, popular topics, and areas that may require further optimization. These insights can inform business decisions and enhance the overall effectiveness of your AI assistant.
Account
Explore the various features within the "Account" settings that empower you to maximize the innovation and efficiency of your iera.ai experience. Discover insights into your API usage, manage your account balance, and explore plan upgrade options to meet your evolving needs.
Ensure uninterrupted access to iera.ai's capabilities by topping up your account. This allows you to add credits to your account, enabling you to continue asking questions and utilizing advanced language model features.
-
Getting Started: User Account
- Access the "Account" section within your iera.ai assistant interface.
- Review the details of your API usage to understand how effectively iera.ai is contributing to your applications.
- Click on top up to add credits to your account to ensure continuous access to iera.ai's advanced language model capabilities.
Please feel free to Contact us to unlock additional features and other enterprise capabilities that align with your project requirements. We would be happy to serve you..!